
TL:DR: Nesting in Premiere Pro lets you group multiple clips into a single nested sequence so you can move, trim, and apply effects all at once. It’s one of the easiest ways to clean up a messy timeline and improve playback performance. Unnesting gives you the flexibility to go back, access the original clips, and fine-tune individual edits whenever you need. Master both, and your timeline management instantly levels up.
Becoming efficient in Premiere Pro isn’t just a nice bonus; it’s essential. A streamlined workflow saves you time, keeps your edits organized, and helps prevent small mistakes from turning into big headaches later. And a huge part of that efficiency comes down to timeline management.
In this tutorial, we’ll break down two key skills that will instantly clean up your workflow: how to nest clips in Premiere Pro to simplify your timeline, and how to unnest clips when you need to dive back in and fine-tune the details.
What does nesting mean?
Nesting in Premiere Pro is a powerful feature that lets you group multiple clips into a single unit on your timeline. Instead of managing several separate layers, you combine them into one nested sequence, making your edit cleaner and easier to control.
This is especially helpful when working with complex timelines and reducing clutter. Once you nest clips, you can apply effects, transitions, or adjustments to the entire group at once. That means fewer repetitive steps and a much faster workflow.
Additionally, nesting can also improve performance in your project. By consolidating multiple layers into a single sequence, Premiere Pro has fewer active elements to process during playback. The result? Smoother previews and less strain on your system, particularly in effects-heavy projects.
How to nest and unnest in Premiere Pro
Nesting in Premiere Pro helps you join multiple clips together into a single sequence. Instead of shifting, trimming, or applying effects to several individual clips, you can control everything at once, making your timeline cleaner and far easier to manage.
But editing isn’t always linear. Sometimes you need to dive back in and tweak a specific cut, adjust timing, or refine an effect. That’s where knowing how to unnest in Premiere Pro becomes just as important.
Let’s tackle both skills in this tutorial step by step. I’ll demonstrate using two stock video clips from Envato. You can download them here and here as we tidy up the timeline together.
How to nest in Premiere Pro (step by step)
Nesting in Premiere Pro is one of those skills that instantly makes you a faster, cleaner editor. You can merge several multimedia clips into a single nested sequence, so you can move, trim, and apply effects without juggling a stack of separate layers.
It’s also a simple way to declutter your Timeline, especially when you’re working with complex sections like montages, multi-layered B-roll, or grouped animations. By nesting clips, you streamline your workflow, stay organized, and make your project much easier to manage as it grows.
1. Choose media to nest
Nesting works with any multimedia in your project’s Timeline. This includes video clips, audio tracks, music, still images, graphics, adjustment layers, and more. If it’s sitting on your timeline, you can nest it. In this example, we’ll combine the two stock video clips mentioned earlier into a single nested sequence.
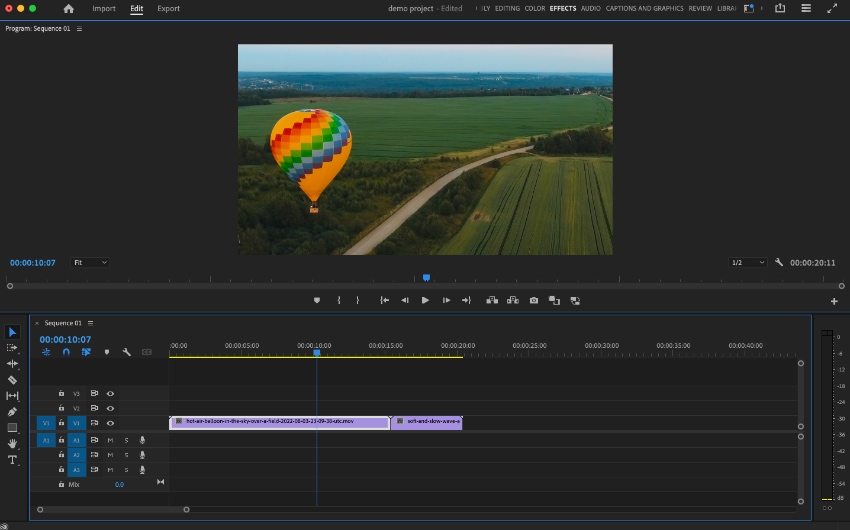
To get started, make sure both clips are placed on your Premiere Pro Timeline. If you’re new to Premiere Pro, the Timeline is located in the lower center of your workspace, directly beneath the Program Monitor (the video preview panel). This is where all your editing happens: cuts, trims, transitions, and effects.
Once your clips are positioned the way you want them, you’re ready to select and nest them into one clean, organized sequence.
2. Start nesting clips in Premiere Pro
To start nesting clips in Premiere, open the Timeline panel. First, click on the initial multimedia clip you want to include in the nest. Then, hold down the Shift key on your keyboard and click the additional clips you’d like to group together. This allows you to select multiple clips at once, whether they’re stacked across tracks or placed side by side.
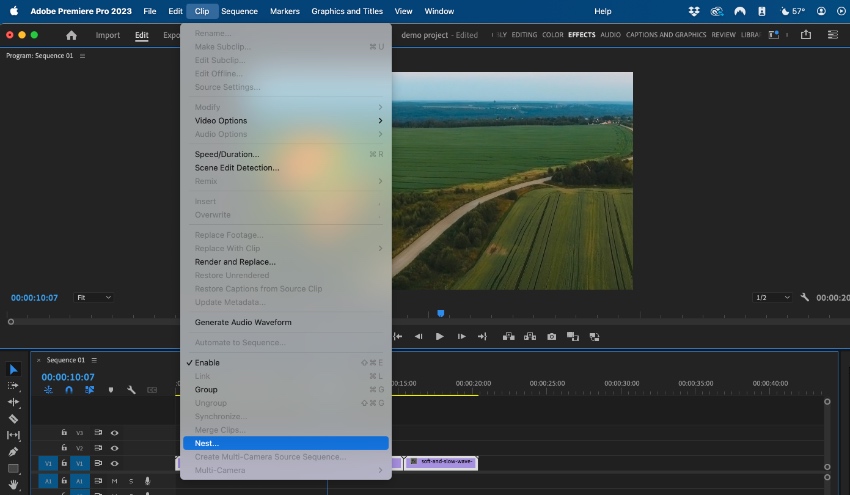
With your clips selected, move to the top menu bar and click Clip. From the dropdown menu, scroll to the bottom and choose Nest. Premiere Pro will prompt you to name your new nested sequence, give it something clear and descriptive (for example, Intro Montage Nest), then click OK.
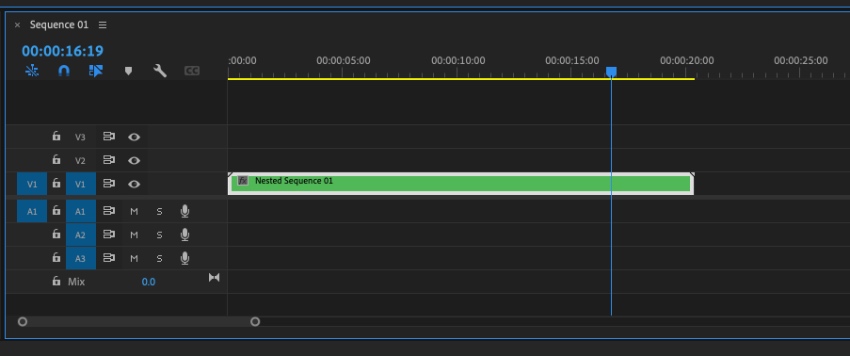
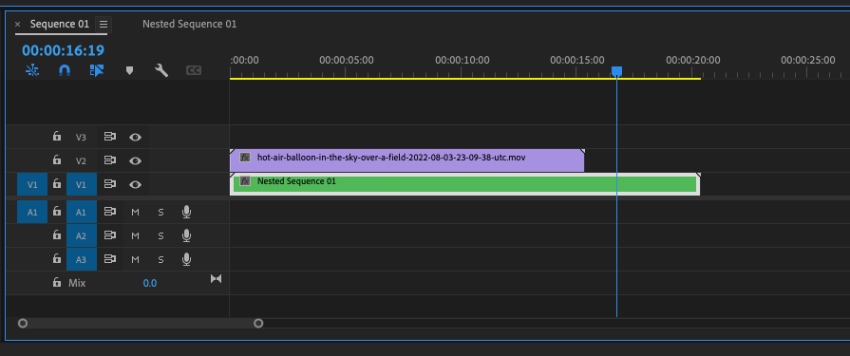
Now take a look back at your Timeline. Instead of several separate clips, you’ll see a single green clip. That’s your Nested Sequence. Just like that, you’ve grouped multiple elements into one clean, manageable unit, making your timeline instantly more organized.
How to unnest in Premiere Pro
You’ve learned how nesting clips in Premiere Pro can clean up your timeline and simplify complex edits. But what if you need to go back and tweak the individual clips inside that nested sequence? That’s where unnesting comes in, and thankfully, it’s just as straightforward.
If you just created a nested sequence, the quickest way to reverse it is to go to Edit > Undo (or use your keyboard shortcut). That instantly restores your original, separate clips.
However, if some time has passed or you’ve continued editing, unnesting requires a slightly different approach. Let’s work through these steps so you can safely return to your individual clips without disrupting your project structure:
1. Open the nested track
Remember, nested clips in Premiere Pro appear as a single green clip in your Timeline. This green clip represents a nested sequence, essentially a sequence within your main sequence.
T
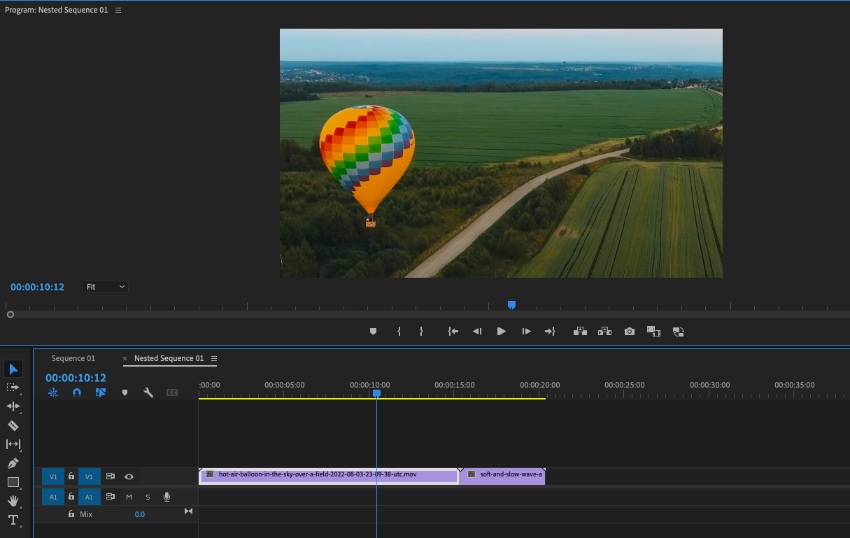
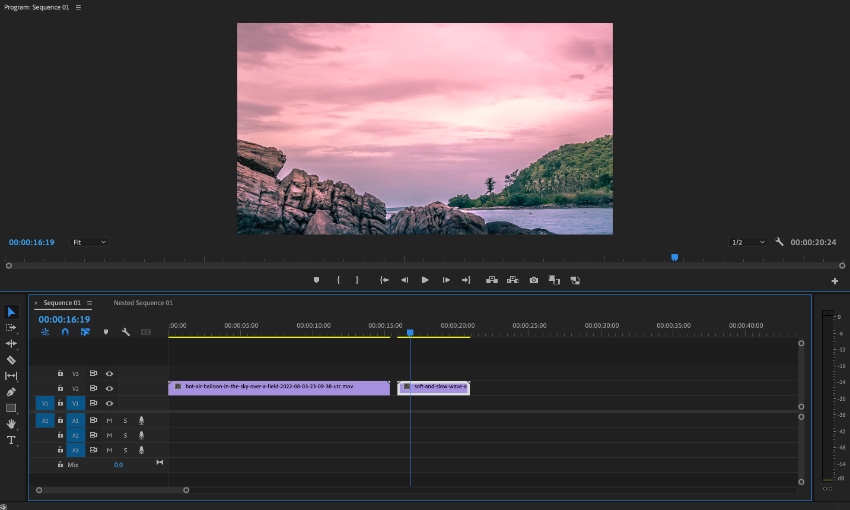
To open the nested sequence, simply double-click on the green clip in your Timeline. When you do, Premiere Pro will switch you to a new Timeline tab, labeled with the name you gave the nested sequence when you created it. Inside this tab, you’ll see all the original individual clips exactly as they were before nesting. From here, you can review, adjust, or prepare to fully unnest them back into your main timeline.
2. Move media to the original sequence
On the Nested Sequence tab, you’ll see your individual clips. Again, these can include videos, audio, and more as they were before nesting. In our example, you’ll see both of the video clips, side by side, ready to be edited individually.
Want to fully unnest and work with those clips directly in your main project? All that you have to do is move the clips back to your original sequence. Start by clicking and dragging one of the video clips from the nested timeline. While holding it, drag your cursor up to the original sequence tab (for example, Sequence 01). Hover over it until the tab opens.
Once your original Timeline appears, drag the clip into position and release it where you want it placed.
You can repeat this process for any remaining clips inside the nested sequence. When all your media has been moved back into the main Timeline, you can safely delete the green Nested Sequence clip.
That’s how to unnest in Premiere Pro. When you know how to nest and unnest, you can gain flexibility and control over even the most complex timelines. It’s one of those everyday editing skills that keeps your workflow fast, organized, and fully in your hands.
The best source for Premiere Pro templates (with unlimited downloads)
Envato is the go-to creative library for Adobe Premiere Pro templates. These professionally designed, ready-to-use templates make editing faster, smoother, and far less stressful, whether you’re building a YouTube intro, a social media promo, or a cinematic opener.
With thousands of Premiere Pro projects available, you’ll never start from a blank timeline again. With an Envato subscription, you can grab as many files as you need for your next video project. The entire creative asset library is carefully curated for quality, so you’re working with polished, professional assets that save time and elevate your results.

And it doesn’t stop at Premiere Pro templates. Your subscription unlocks millions of creative assets, including stock photos, footage, royalty-free music, sound effects, graphic templates, and more. Everything you need to build a complete, cohesive production under one roof.
If you’re experimenting with generative AI-powered workflows, Envato also offers tools built for modern creators. One standout is VideoGen, an AI video generation tool with smart generation and editing capabilities. It can help speed up content creation, automate certain editing tasks, and streamline early-stage production, especially when you’re producing high volumes of social or marketing content.
You just mastered nesting Clips and unnestting clips in Adobe Premiere Pro
Learning how to unnest in Premiere Pro is just as important as knowing how to nest. Together, these two skills are the secret to keeping your timeline clean, organized, and easy to control. When your project stays tidy, you edit faster, make fewer mistakes, and save yourself serious time in the long run.
Now, it’s your turn to put it into action. It’s time to practice how to nest in Premiere Pro. Open a project that’s starting to feel cluttered and practice how to nest clips in Premiere Pro to simplify your timeline. Then, switch things up and unnest those clips to fine-tune the details.
That hands-on repetition is what locks the skill in, and once you get comfortable with it, nesting and unnesting will become part of your everyday editing workflow.
What does nesting mean in Premiere Pro?
What does nesting mean in Premiere Pro?
Nesting means grouping multiple clips into one nested sequence. Instead of managing several layers individually, you combine them into a single green clip on your timeline. This makes complex edits easier to control and keeps your timeline organized.
How do I nest clips in Premiere Pro?
How do I nest clips in Premiere Pro?
Select your clips, then choose Clip → Nest. Hold Shift to select multiple clips in your Timeline, click Clip in the top menu, and choose Nest. Name your nested sequence and click OK. Your selected clips will be combined into a single green nested sequence.
How do I unnest in Premiere Pro?
How do I unnest in Premiere Pro?
Open the nested sequence and move clips back to the original timeline. Double-click the green nested sequence, drag the original clips back to your main sequence tab, and place them in your Timeline. Then delete the nested sequence clip.
Can I edit clips inside a nested sequence?
Can I edit clips inside a nested sequence?
Yes, you can edit nested clips at any time. Double-click the green nested sequence in your Timeline to open it in a new tab. From there, adjust cuts, timing, effects, or transitions without affecting your main sequence layout.
Does nesting improve performance in Premiere Pro?
Does nesting improve performance in Premiere Pro?
Yes, nesting can improve playback performance. By consolidating multiple layers into a single nested sequence, Premiere Pro has fewer active elements to process, leading to smoother previews, especially in effects-heavy projects.