
TL;DR: In this guide, you’ll learn exactly how to configure Premiere Pro’s export settings to create a video file with a transparent background. The process includes selecting QuickTime as your format, choosing the correct video codec, enabling Render at Maximum Depth, and activating 8-bpc + alpha under Depth. You’ll also see how to use your exported file as a clean overlay on top of other footage in your timeline.
Transparent videos are essential when you want graphics, titles, or effects to sit cleanly over other footage. Instead of exporting an animation with a black background, you can preserve transparency so it layers naturally on any timeline.
Before diving into export settings, it’s helpful to understand why transparency matters in video editing.
Why transparent backgrounds matter in video editing
Transparent backgrounds aren’t just a technical setting; they’re what make overlays look intentional instead of accidental.
Think of transparent video elements like digital stickers for your timeline. When exported correctly, they sit naturally on top of your footage. When exported incorrectly, you get a black rectangle blocking everything behind it. Not ideal.
Here’s where transparency makes a real difference:
1. Lower thirds and titles
Animated name tags, subtitles, and call-to-action graphics need to float cleanly over your footage. A solid background instantly breaks the illusion.
2. Branded content
Logos, watermarks, and intro animations only work as overlays when their backgrounds are transparent. Otherwise, they look pasted on rather than integrated.
3. Cinematic VFX
Cinematic VFX such as smoke, sparks, dust, and light leaks are designed to blend seamlessly into a scene. Export them without transparency, and you lose that blend entirely.
4. Streaming and live content
Twitch alerts, webcam frames, and animated notifications rely on transparent assets. Without alpha support, every alert becomes a distraction instead of an enhancement.
At the core of all this is the alpha channel, the part of your video file that tells editing software which pixels are visible and which are see-through. Once you know how to export with it enabled, layering graphics becomes second nature.
Step-by-step guide: How to export a transparent video in Premiere Pro
Now that you understand why transparency matters, let’s walk through the exact export settings you need.
The key is enabling the alpha channel during export. This tells Premiere Pro which areas of your video should remain transparent rather than be filled with black. Once enabled, you can place your animation cleanly over other footage, graphics, or images.
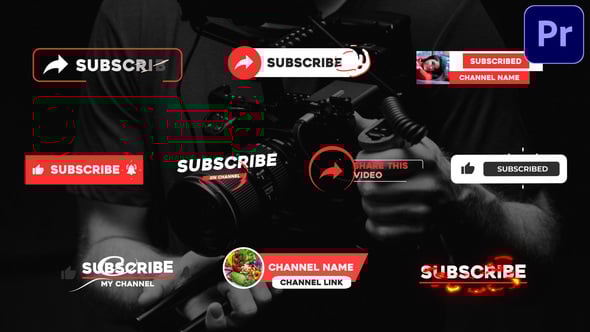
For this walkthrough, we’ll use this Subscribe Lower Thirds template as an example to demonstrate how transparency works in a real-world overlay.
1. Launch the Export Menu
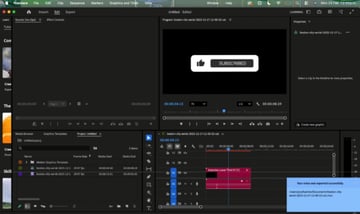
Open Premiere Pro, and load the template we’ll be working with. When you preview the graphic, you’ll notice a black background surrounding the button. If you exported it right now, that solid backdrop would be baked into the final video.


What you need instead is a transparent background. That way, you can place the Subscribe animation over any video or image in Premiere Pro (or another editing app) without blocking what’s behind it.
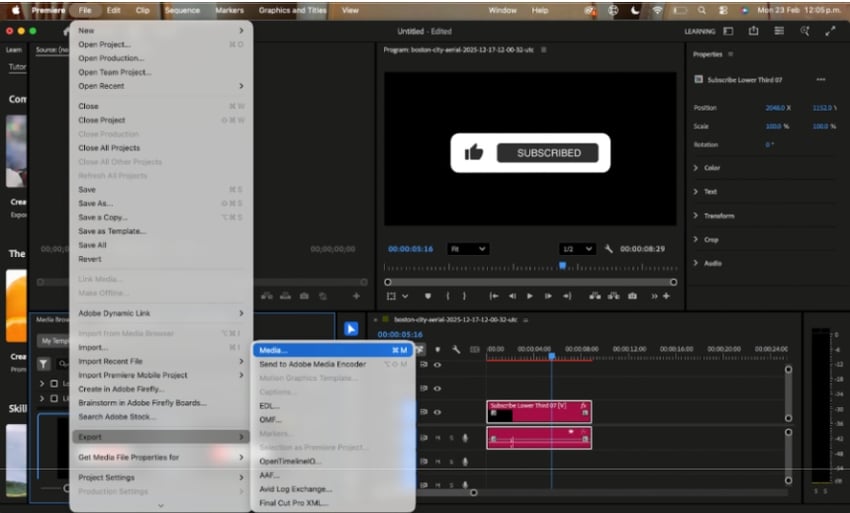
The first step to export transparent videos from Premiere is to open the Export settings menu. Think of this menu as your project’s control center — this is where you define how the final video will look and behave.
Click File, hover over Export, and select Media.


2. Choose the correct export format
The next step in learning how to export a transparent video in Premiere Pro is to select a video format.
When the Export window opens in Premiere Pro, you’ll see several options listed on the left, including Media File, YouTube, Vimeo, and more. For this workflow, choose Media File.
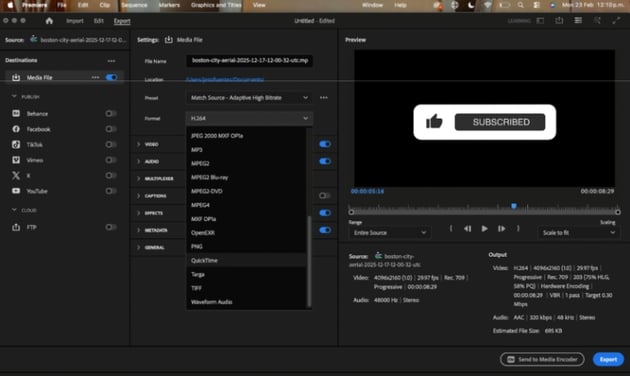
Now, move to the Settings panel in the center of the window. At the top, you can rename your file and choose where to save it. Just below that is one of the most important options: Format.
The format determines the file type of your exported video. Some formats don’t support transparency, so choosing the right one is essential.
Open the Format dropdown and select QuickTime. This container supports codecs that preserve alpha channels.
Note: In Premiere Pro, QuickTime is the most reliable option for preserving alpha channels (the transparency information in your video).


3. Choose render and export settings
Now, let’s configure the video settings that control quality and transparency.
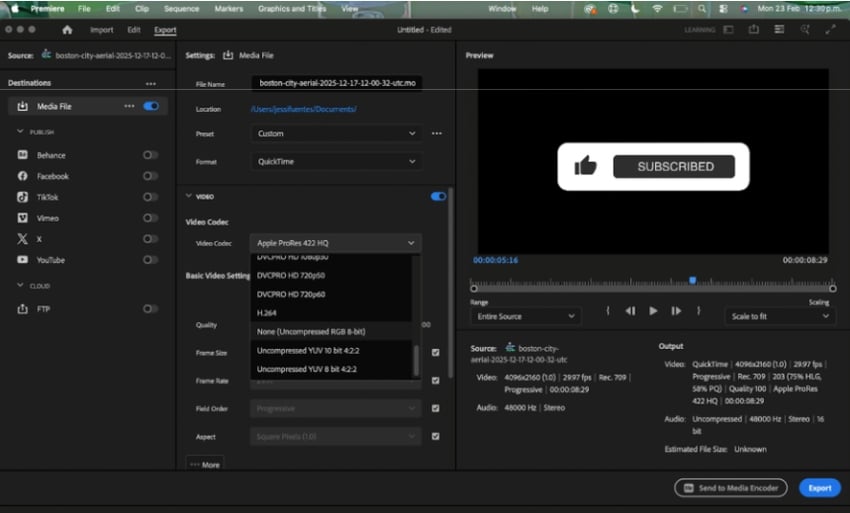
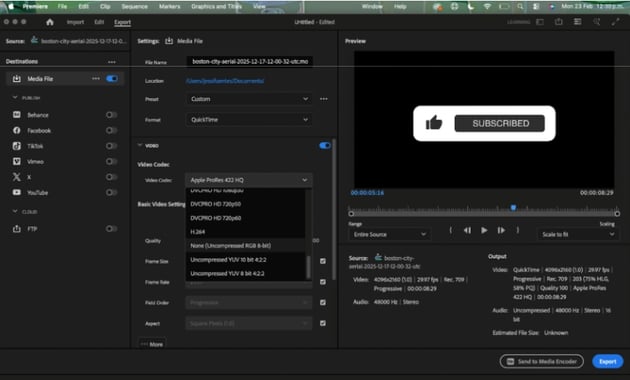
Open the Video dropdown. In the upper section, locate the Video Codec menu. Click the Video Codec dropdown to see your available options. For the best quality and full transparency support, select None (Uncompressed RGB 8-bit). This option preserves maximum image quality and ensures your alpha channel remains intact. However, uncompressed exports can create extremely large files — especially in 4K.

Pro tip: If you need to export transparent video in Premiere Pro but want to save disk space, choose Apple ProRes 4444 instead of Uncompressed.
Here’s how the main options compare:
|
Codec |
Best for |
Compatibility |
File size |
|
None (Uncompressed RGB 8-bit) |
Absolute maximum quality with zero compression. Ideal for short clips or archival use. |
Mac and Windows. |
Huge — even a few seconds of 4K can exceed several GB. |
|
Apple ProRes 4444 |
Professional overlays and motion graphics. Excellent balance of quality, performance, and file size. Supports alpha channel natively. |
Mac (native). Available on Apple Silicon without extra setup. |
Large — but significantly smaller than Uncompressed. |
|
GoPro CineForm |
Windows users who need transparency support with manageable file sizes and smooth playback. |
Windows (recommended). Limited support on Apple Silicon systems. |
Medium. |
In some cases, Animation can also produce good results with transparency. If file size matters more than maximum quality, you can test this option. However, None(Uncompressed RGB 8-bit) is a reliable starting point.
With your codec selected, scroll further down in the Video Settings. If you see a More tab, click it to reveal additional options.In recent versions (including 2026), the advanced video options are displayed by default.
Next, enable Render at Maximum Depth. This improves color precision during export, helping preserve gradients and motion graphics details.
Now activate the alpha channel. Open the Depth dropdown and choose 8-bpc + alpha. This ensures your exported file includes transparency data instead of filling empty areas with black.

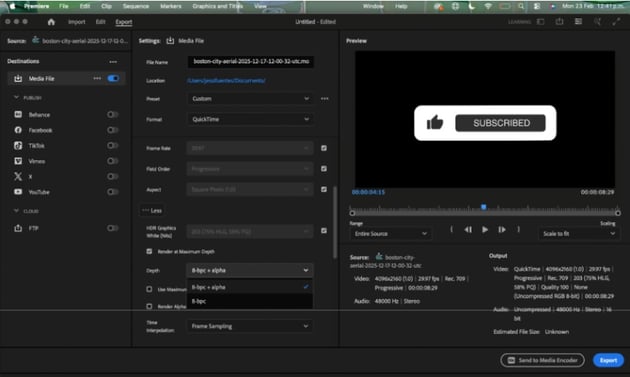

Note: Alpha channels control which areas of your video are visible and which are transparent. Without an alpha channel, Premiere fills empty areas with black. With 8-bpc + alpha enabled, those areas remain invisible — allowing you to place your exported video cleanly over other footage without a background.
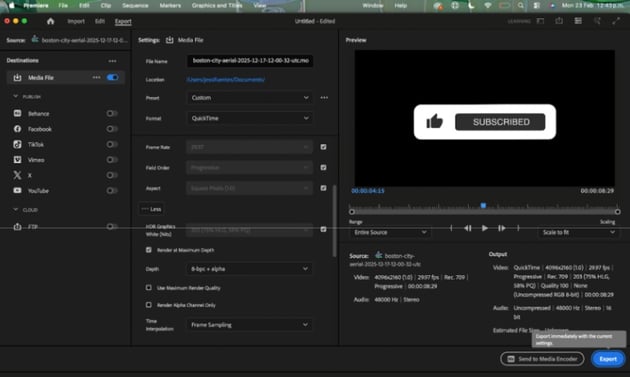
4. Export the transparent video background clip
Now you’re ready to export your transparent video. Locate the blue Export button in the lower–right corner of the window. Click it, and Premiere Pro will begin rendering your project as a QuickTime (.mov) file with transparency enabled.
Once the export finishes, you’ll have a .mov file that retains its alpha channel.


5. Use the exported transparent clip in your project
Important: Exporting does not alter your existing timeline. It simply creates a new file on your computer, preserving transparency via the alpha channel.


Once the export is complete, here’s how to put your transparent clip to work:
- Return to Premiere Pro (or open a new project where you want to use the overlay).
- Import the exported .mov file by going to File > Import.
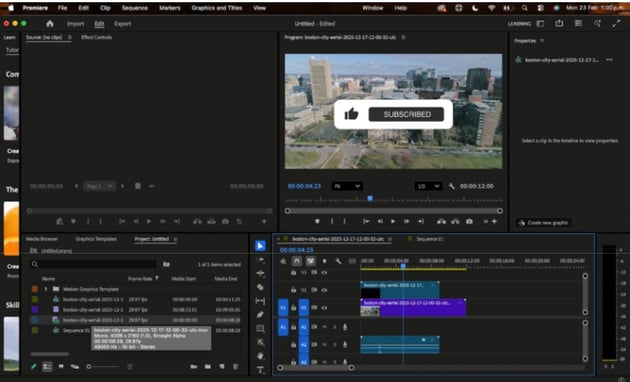
- Add your background footage by dragging your video or image onto the V1 track in the Timeline.
- Place the transparent .mov file above it, such as on V2 or V3, directly over the background layer.
- Preview the result by pressing play — you’ll see only the animated element (such as the Subscribe button) displayed as an overlay, without any background.


Optional: Export your final video for delivery
If you’re exporting a final version for YouTube or social media, go to File > Export > Media again. This time, choose H.264 as the format and select a preset like YouTube 1080p Full HD. Rename your file, choose a save location, and click Export.
This creates a standard .mp4 file ready for upload.
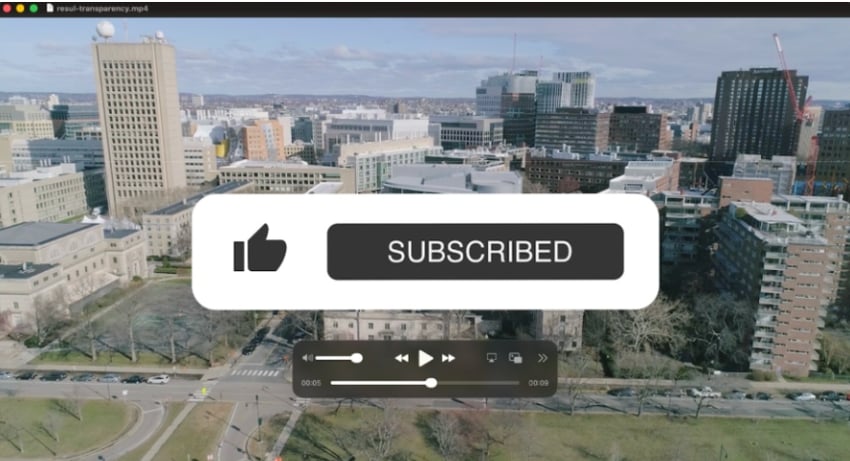
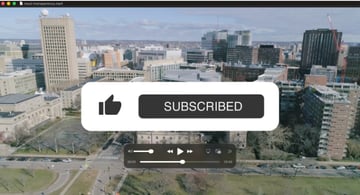
Look at the finished result
Notice how only the Subscribe button remains visible; the black background is completely gone. The animation sits cleanly over the Boston city aerial footage, blending naturally into the scene.
With just a few precise export settings, you can create polished overlays that add depth and flexibility to any edit.

Find the right Premiere Pro templates for your next project
If you regularly work in Adobe Premiere Pro, having high-quality templates ready to go can dramatically speed up your workflow. Instead of building every lower third, title, or transition from scratch, you can start with professionally designed assets and customize them to fit your brand.
Envato offers thousands of ready-to-use Premiere Pro templates designed to integrate seamlessly into your projects.
And it doesn’t stop there. A single subscription gives you access to stock videos and photos, textures, patterns, 3D assets, music, sound effects,fonts, and even AI tools. That means you can build an entire video project, from intro animation to final soundtrack, without switching platforms.
Export transparent videos in Premiere Pro with confidence Exporting transparent background videos in Premiere Pro comes down to one key principle: enabling the alpha channel correctly. Once you understand how formats, codecs, and depth settings work together, transparency stops feeling technical and starts feeling routine.
The real advantage isn’t just removing a black background; it’s flexibility. Transparent overlays let you reuse animations across multiple projects, stack motion graphics cleanly, and maintain a professional finish without rebuilding assets every time.
Whether you’re creating projects for clients or refining your own skills, you now know exactly which settings to use. Export your overlays with confidence and focus on designing visuals that elevate your edit.
Export a transparent video in Premiere Pro FAQs
|
Does Premiere Pro support transparent video exports? |
|
Yes. Premiere Pro supports transparency via alpha channels when exporting to compatible formats, such as QuickTime (.mov). However, not all codecs or formats preserve transparency, so choosing the correct export settings is essential. |
|
Why can’t I export transparency as MP4? |
|
MP4 (H.264) does not support alpha channels. Even if your timeline contains transparent elements, exporting as MP4 will automatically replace transparent areas with black. To preserve transparency, you must export using a format that supports alpha channels, such as QuickTime with 8-bpc + alpha enabled. |
|
What’s the best codec for transparent overlays? |
|
For most workflows, Apple ProRes 4444 offers an excellent balance between quality and manageable file size while preserving transparency. Uncompressed RGB provides maximum quality but results in very large files. The best choice depends on your platform and storage needs. |
|
Why is my exported file extremely large? |
|
Transparent exports often use high-quality codecs that preserve full color and alpha data. Uncompressed RGB, in particular, creates very large files because no compression is applied. If file size is a concern, consider using ProRes 4444 instead. |
|
Can I remove a background from regular footage? |
|
Yes, but that requires keying or masking rather than export settings. Tools like Ultra Key or the Remove Background feature (in newer versions) can isolate subjects. Once the background is removed, you can export using alpha channel settings to preserve transparency. |
|
How can I check if my file contains transparency? |
|
After exporting, import the .mov file back into Premiere Pro and place it over a different background. If the underlying footage remains visible, the alpha channel was preserved correctly. |
|
Where can I find ready-to-use transparent overlays? |
|
Professional motion graphics templates designed for Premiere Pro often include built-in transparency. Platforms like Envato provide thousands of customizable overlays, lower thirds, and animated titles ready for alpha-based workflows. |